Sunday 30 November 2014

Gift Card Purse

This cute little Gift Card Purse is an ideal solution to making a gift card more personal.
 
Crochet Gift Card Purse

sparkle yarn gift card purse
 
 
They can be made very quickly ....... and they look especially pretty in sparkle yarn, with a contrast colour border.
 
Or use different colours for a fun look ......
 
 
Gift Card Purse


Gift Card Purse


Requirements:

 DK yarn


 4mm crochet hook


Pretty button


 Pattern:


This pattern is written in UK terminology:~         

sc = single crochet                  dc = double crochet               tc = treble crochet      


Foundation Chain:   chain 16


Round 1:   1tc in third chain from hook, 2tc in every second stitch along chain (14sts),


and then continue in the same way along the bottom of the chain, making 2tc in in every other stitch . (28sts in the round).


Join with a slip stitch.


Round 2:   chain 3 and make 1tc into the first 2-stitch group, 2tc in each 2-stitch group all around. (28sts).  Join with a slip stitch.


 Repeat round 2 four times more


Edging Round:  chain 1 then make 1dc in every stitch until the middle of one side, ch 10 (to make a button loop), join to next stitch of the purse edge, and continue making 1dc in every stitch  to the end of the round. 

Join with a slip stitch.

Cut off yarn.


Darn away ends.

Add a pretty button.

Put a gift card inside 


Copyright © 2014 ‘made by marianna’  All Rights Reserved
This pattern (the information and photos) may not be copied or reproduced
or republished on another webpage or website.
‘This work is registered with the UK Copyright Service.’

Wednesday 26 November 2014

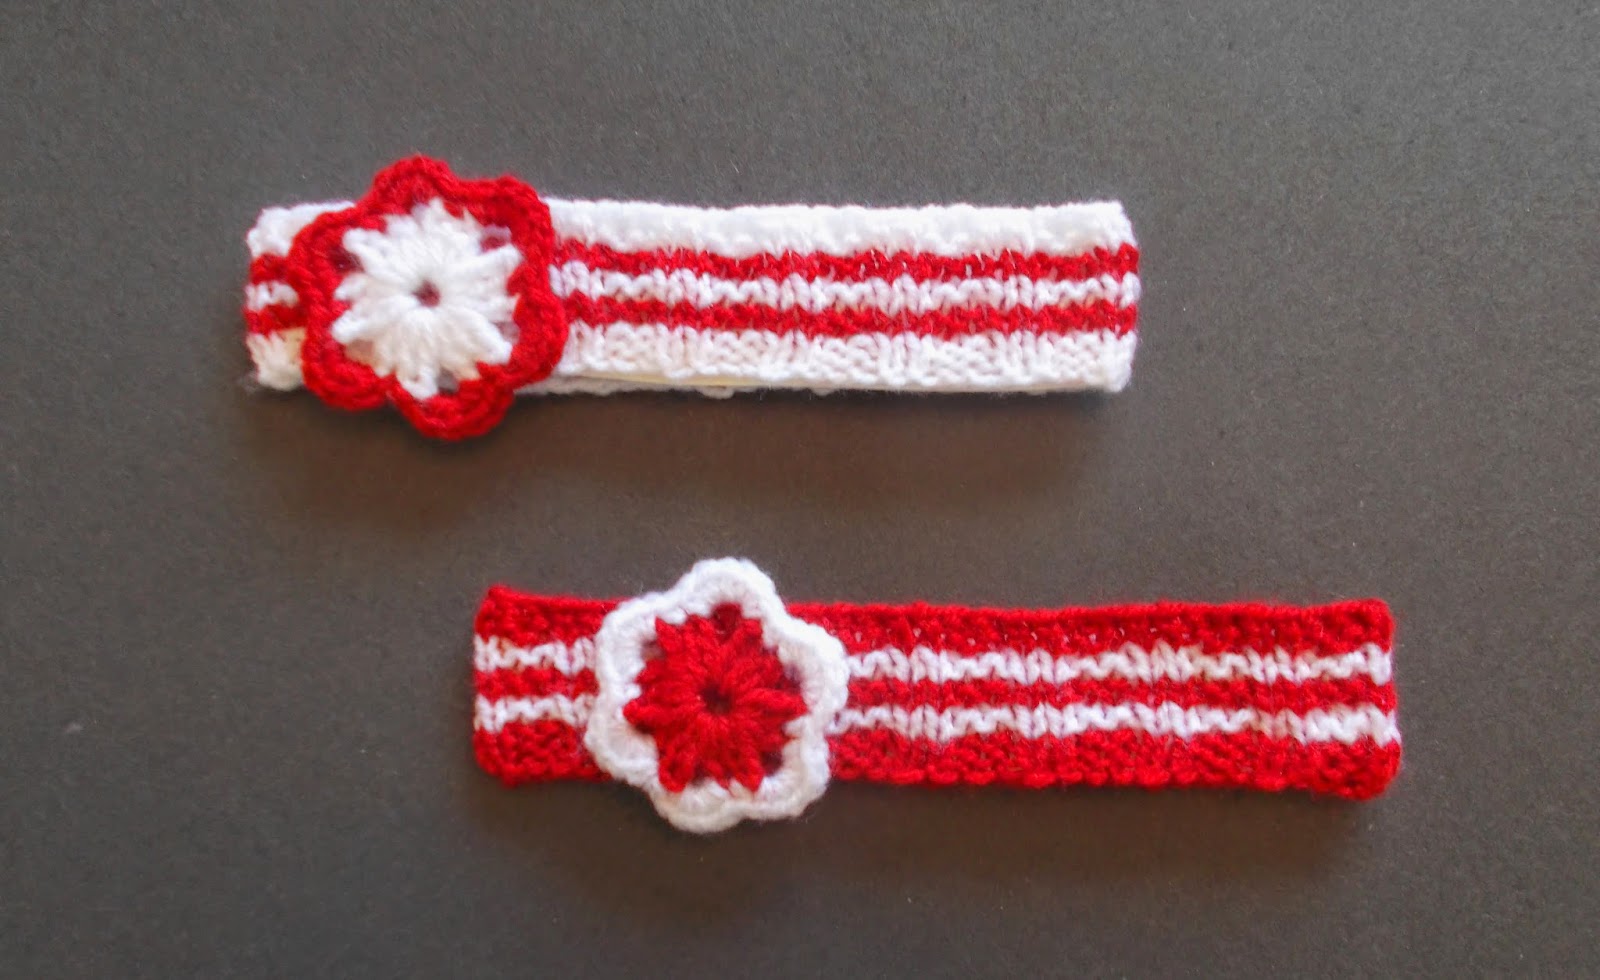
Festive Baby Headband


Babies look cute wearing nothing!  But they can look even sweeter wearing a pretty adornment ..........

These little headbands look perfect for the festive season ~


Festive Baby Headband

 These are made with DK (8ply) yarn and 4mm needles.

Using first colour, cast on 66sts
1st Row:               S1, p1, *(k2, p2) repeat from * to last 4sts, k2, p1, k1
2nd Row:               S1, k1, *(p2, k2) repeat from * to end   

Join in second colour ~
3rd Row:               Knit
4th Row:                S1, k1, *(p2, k2) repeat from * to end   

Using first colour ~
5th Row:                Knit
6th Row:                S1, k1, *(p2, k2) repeat from * to end   

Using second colour ~
7th Row:                Knit
8th Row:                S1, k1, *(p2, k2) repeat from * to end   

Using first colour ~
9th Row:                Knit
10th Row:             S1, k1, *(p2, k2) repeat from * to end   

Cast off using a stretchy cast off
Add a pretty decoration –

You will find this easy little flower decoration here ~  http://mariannaslazydaisydays.blogspot.co.uk/2014/11/easy-little-crochet-flower.html
or ........ to make this pretty flower ~
Flower:

Chain 3, join with a slip stitch into a ring

Round 1: ch2, make 11tc into ring, slip stitch to join (12sts)

Round 2: ch2, 4tc into same stitch, slip stitch into next stitch, 5tc into next stitch, slip stitch into next stitch, continue around.
There should be 6 petals.

Copyright © 2014 ‘made by marianna’  All Rights Reserved
This pattern (the information and photos) may not be copied or reproduced
or republished on another webpage or website.
‘This work is registered with the UK Copyright Service.’
 

Tuesday 25 November 2014

Easy Little Crochet Flower

It's that time of year when you just need some 'quick to make' adornments...... for hats, scarves, mittens, purses, phone socks, tree decorations.......
 
My crochet hook just invented these ~ hope you like them.


I made these with DK (8ply) yarn and a 4mm hook ~ they measure 2 ½ “   (6.5cm)


Easy Little Crochet Flower:
 

This pattern uses UK terminology ~

ch        =          chain

tc         =          treble crochet

dc        =          double crochet

 
Chain 5, join with a slip stitch into a ring

 
Round 1: ch2, 2tc, ch3, *3tc, ch3, repeat from * 4 times more, join with a slip stitch

 
Using a contrast colour -


Round 2:  *6dc into ch3 of previous round, 1dc into centre of 3tc of previous round, repeat from * 5 times more, join with a slip stitch

Darn away ends.
 
 
They look really cute in festive colours ~


Copyright © 2014 ‘made by marianna’  All Rights Reserved
This pattern (the information and photos) may not be copied or reproduced
or republished on another webpage or website.
‘This work is registered with the UK Copyright Service.’

Saturday 22 November 2014

Warm Tweedy Mittens

Cosy Mittens -    

Fingerless or Full Mittens  ~  you chose .........


Warm Tweedy Mittens


Warm Tweedy Fingerless Mittens
 
Use 2 strands of DK yarn (8ply) knitted together ~ or any combination of yarns to make a total of 16ply .

I used 1 strand of DK plus 2 strands of 4ply               This gives a nice ‘tweedy’ look

7 ½ mm needles


For a Woman -
Cast on 21sts
1st Row:           K1, *k3, p1, repeat from * to last 4sts, k4
2nd Row:           K2, *p1, k3 repeat from * last 3sts, p1, k2
Repeat these two pattern rows 18 times more – or until around 9” (23cm) – or adjust to the length you require,
 39th Row:        K1, *k3, p1, repeat from * to last 4sts, k4
Cast off in pattern.
Sew up the side seam, leaving a gap for the thumb. Darn away loose ends.
Make another mitten the same.


Warm Tweedy Mittens
 
Use 2 strands of DK yarn (8ply) knitted together ~ or any combination of yarns to make a total of 16ply .
I used 1 strand of DK plus 2 strands of 4ply               This gives a nice ‘tweedy’ look
7 ½ mm needles
 
For a Woman -
Cast on 21sts
1st Row:           K1, *k3, p1, repeat from * to last 4sts, k4
2nd Row:           K2, *p1, k3 repeat from * last 3sts, p1, k2
Repeat these two pattern rows 10 times more
23rd Row:         K1, *k3, p1, k3, p1,slip next 3sts onto a safety pin (for the thumb), cast on 3sts, p1, k3, p1, k4
24th Row:         K2, *p1, k3 repeat from * last 3sts, p1, k2
25th Row:         K1, *k3, p1, repeat from * to last 4sts, k4
26th Row:          K2, *p1, k3 repeat from * last 3sts, p1, k2
Repeat these two pattern rows 11 times more
49th Row:         S1,* k2tog, p2tog, repeat from * to end
50th Row:         S1, p2tog to end
Break off the yarns, leaving a long ‘tail’
 
Thread the tail through the remaining stitches, and pull up tightly. 
With right side facing, rejoin yarns to the 3sts left on a safety pin for the thumb ~
Thumb
1st Row:           Pick up and knit 5sts around the thumb hole, then continue across the 3sts held on a safety pin – k2, kfb into last st                                     (9sts)
2nd Row:           K2, p1, k3, p1, k2
1st Row:           K1, k3, p1, k4
2nd Row:           K2, p1, k3, p1, k2
Repeat these two pattern rows 4 times more
S1, k2tog, p2tog, k2tog, p2tog
S1, p2tog, p2tog
Break off the yarns, leaving a long ‘tail’
Thread the tail through the remaining 3 stitches, and pull up tightly. 
Sew up the thumb seam.
Sew up the side seam. Darn away loose ends.
Make another mitten the same.


You will find my matching neckwarmer at ~
 
 
and my matching hat at ~


Copyright © 2014 ‘made by marianna’  All Rights Reserved

This pattern (the information and photos) may not be copied or reproduced

or republished on another webpage or website.

‘This work is registered with the UK Copyright Service.’